
If you just purchased your first RV or are getting ready to purchase your first RV, congratulations and welcome to the wonderful world of RV life. RV travel is an amazing way to travel the country. Whether it’s for pleasure or for work, always having the luxuries of home with you makes travelling that much more enjoyable.
There are different kinds of RV’s. If you’re looking for one, you’re probably realizing this. There will come a time when you must decide if you want a motorhome (drivable RV), a fifth wheel (pulled by a truck using the bed), or a travel trailer/ pop up (pulled by the bumper of a truck or SUV). Within each of those classifications there are subclasses to consider as well. For example, a motorhome can be a Class A, Class B or Class C. You can check out our post on different kinds of RV’s and which one may be best for you. If you’ve already decided, great! This list is a general list for all types of RV’s. It does not include things like hitches, as those will be specific for what type of RV you have.
If you’re purchasing your RV through a dealer, chances are they are going to sell you everything on this list, or at least most of it. You can absolutely buy everything from them, we did our first time, but I would urge you to shop around. You can either find somethings for less or better quality. When it comes to RV gear, better quality trumps less expensive, not all the time though. If you’ve already purchased, you may have opted not to get their “starter kit” or maybe they didn’t offer one. This list will get you started either way.
Wheel Chocks
Wheel chocks are critical for any type of RV you buy, most importantly for the towables (5th wheels travel trailers, and pop ups). Using chocks on motorhomes is a matter of opinion but most suggest using them as an extra precaution in case the parking brake fails. The last thing anyone wants is for their home on wheels to roll away on its own. You should chock your wheels every time your RV is parked even if it’s on completely level ground. You never know and for time it takes to chock them (not long), it’s worth the seconds.

Our dealer sold us plastic yellow chocks with our first travel trailer. They did what they were supposed to do. I even checked them a couple of times just to be sure. However, rubber chocks are much more reliable, especially when parked on gravel or concrete. Yes, they are more expensive, but this is where quality over price comes into play. The extra piece of mind is worth it.
These are the wheel chocks we have now and here are the yellow ones we had with our first travel trailer.
Drinking Water Hose and Pressure Regulator
Yes, technically these are two items, but they go together so they are in the same category. Let’s talk water hoses first. Did you know there are water hoses that are labeled “drinking safe”? I know I didn’t when we first started out. I remember plenty of hot summer days as a kid, running around and grabbing a drink from the green garden hose at my neighbor’s house. I had no idea that it wasn’t great for my health. Maybe the world didn’t know back then. Well, we know now, and it turns out the green garden hoses contain things like lead and high levels of BPA as well as other harmful chemicals.
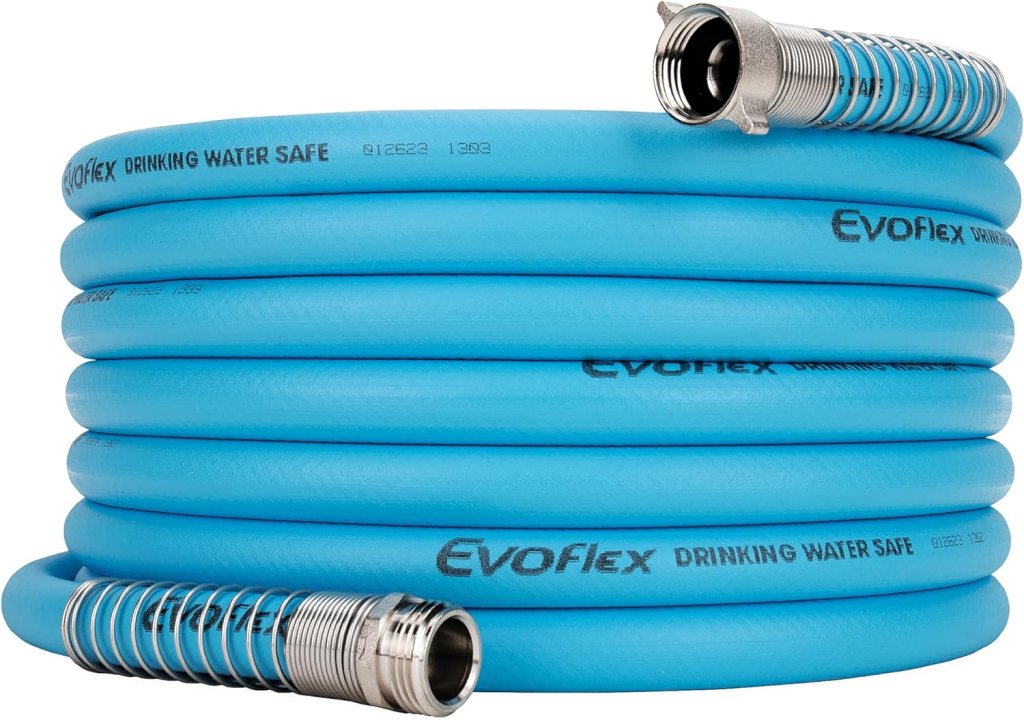
When it comes time to buying your hose, make sure it says, “drinking safe.” This is our favorite hose. It doesn’t kink and is drinking safe. It’s a 25-foot hose which is usually plenty. However, we have been in campgrounds that we needed 50 feet of hose. I recommend buying two 25-foot hoses instead of one 50-foot hose. This way you don’t have to worry about where to wrap up the remaining feet when you’re only 10 feet away from your water source. The drives side of your rig is busy with hoses, electrical cords, and sewer hoses. Less is more and it’s not such an eye sore for your neighbor when they are outside enjoying their fire of having dinner. Our back up hose is this one. We love both so you can’t go wrong with either.
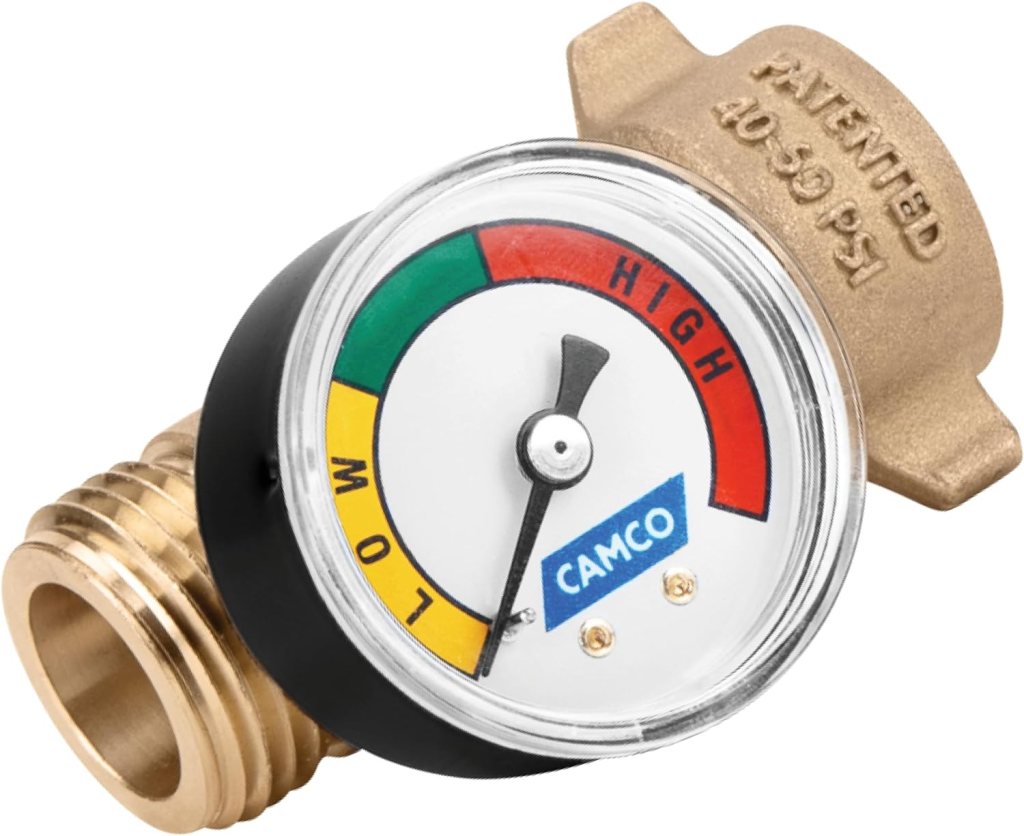
A pressure regulator is very important as well. RV plumbing isn’t like the plumbing in your home. Also, the water pressure at campgrounds can be higher than the pressure in your house. Your RV’s plumbing usually requires 45psi or less. Your owner’s manual will tell you for sure, but that’s usually the rule of thumb. There are a lot of different options for regulators. You can go with this one. It tells you if the pressure is good, bad, or too high but is automatically set at 45 psi. You can also use this one. It doesn’t tell you if the pressure is good, but it is set to 45 psi automatically. We use both. One we use for our drinking water hose (with the gauge) and the other for your black tank flush hose (we’ll get to that later). Whatever one you decide, it’s worth the cost. Fixing plumbing caused my too much pressure will be much more expensive than the regulators. Not to mention, your manufacturers warrantee won’t cover the plumbing if it’s determined the pressure was too high.
Side note: we only have both kinds because I forgot one at a campground and didn’t know until we were at our next campground. The closest store (Walmart) only had the one with the gauge. They usually sell both. Walmart (if you have them near you) will become your best friend for RV supplies.
Sewer hose and connections
For some reason, this is one of the most talked about topics in the RV world on social media. It is rather an important task, but in my opinion, it gets way to much attention. RV’s have holding tanks for your sink, shower, and toilet water. The sink and shower go into the gray tank and the toilet water into the black tank. The size of the tanks will vary depending on your rig. No matter what size you have though, eventually you’ll have to empty those tanks. That’s where the hose and connections come in. You’ll want to get yourself at least 20 feet of hose and the clear elbows. Clear elbows? Why would you want to see what comes out? I know, it doesn’t sound like a good idea, but you’ll want to know 1) if everything is flowing the way it should and 2) when it’s all done. You don’t want to remove that hose before the tanks are actually empty. I suggest using this Camco Rhino Flex kit. I’d also suggest getting at least another 10 feet of hose just in case as well as this Camco sidewinder support. It’ll keep the liquids moving downhill. If your rig comes with a black tank flush, you can use this Camco tank flush hose. If it doesn’t come with one, Camco has you covered again with this tank flush system. These are used to make sure the tanks (especially black) are completely cleared out. You can check out my step by step guide on cleaning tanks here.
Surge Protectors and adapters
Having a surge protector is crucial for your RV. You have tons of things in your rig that require electricity. With that also comes wiring that travels throughout the RV. You want to protect those things, and your RV from an electrical disaster including a fire. You probably already use them in your home, so why not in one of the biggest purchases you’ve made?
There are a few options when it comes to buying one for your rig. First, you’ll want to buy one specifically for the amps of your rig. Most are 30amp of 50amp. Your surge protecter should be the same. Next you’ll have to decide which one is right for you.
For our first two years we used a more generic surge protector. It told us if the wiring was good, and it assumingly protected the RV from surges. We never had issues, so it may have either never needed to protect the rig or it did, and it did its job because we didn’t know. If you go with a generic brand, make sure it at least has the feature of letting you know if the pedestal you’re about to plug in to is safe. Many RVers have shared stories of improperly wired pedestals.
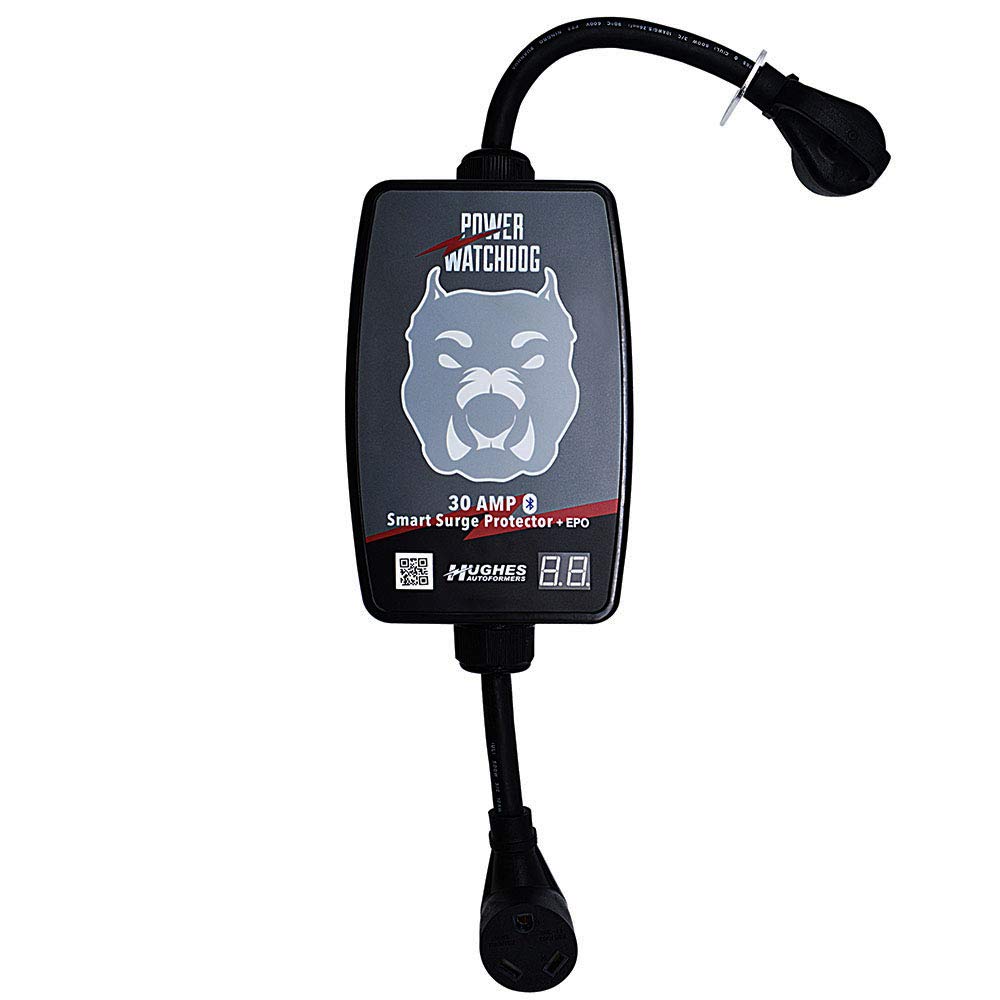
When we went full time, we bought the Power Watchdog from Hughes. This price is steep but there are some added benefits like monitoring the status from your phone via Bluetooth, auto shut off if something goes wrong and auto reboot when things become safe again. If the unit becomes damaged, Hughes will replace just the part you need rather than having to but a whole new unit. I also feel it does a better job recognizing unsafe wiring than the generic one I had. Progressive industries is the competitor for Hughes and many people say they prefer it. I can’t speak on it as I’ve never used one, but I would suspect that it’s very similar and just as reliable as the Power Watchdog. Both have a hardwire option as well. I personally don’t have mine hardwired, but because of the convenience when setting up our site, it may be something I do down the road.
Level
Making sure you rig is level side to side and front to back is not only important for your comfort, but also for the appliances and slides of the rig. Most slide systems (cable, schwintek, etc.) require the RV to be level and stabilized before the slide can be retracted. Depending on what type of refrigerator you have, it too may have to be level to work properly. Back to comfort, if you’re not level side to side you’ll feel like you’re rolling off your bed (assuming your bed is positioned. north/ south) and the same with front to back level. Proper level also ensures water runoff from rain, or the air conditioner will happen properly.

At first, we had a small 1 foot level that I could place on the floor just inside the door. Then I bought this 4ft level so I could place it on the A-frame of the trailer. This was faster and easier since we didn’t have to open doors and take stairs out. Now we have the Levelmate Pro which is a game changer. Of course, convenience equals cost but if you’re moving sites every two days or even every week, being able to check for level from your phone, saves time. I can see from the truck that we need to come up on one side and tell my spotter (usually my wife) where to put the leveling blocks/ ramps. I can then back up on to them and Jasmin doesn’t have to keep checking the bubble level since I can see where to stop from the phone. Levelmatepro is not a necessity but a basic bubble level is.
Leveling blocks/ ramps
That brings us to the devices you’ll need to actually get level. We use these leveling ramps more often than not. I find them to be easier to use and faster. Because of Levelmate Pro, Jasmin will lay these down on whatever side we need, I’ll reverse on to them and when Levelmate Pro turns green, I can stop.
We started off with these leveling blocks. These worked great as well. However, you have to kind of guess how many blocks you need depending on how unlevel you are to start with. It also requires some problem solving as you learn to stack them correctly for maximum lift, safely. If you get it wrong, you’ll have to get off them, add more, and try again.
If you can, I’d recommend getting both. We’ve been in sites where the ramps didn’t lift enough so we had to use the blocks. I’ve also been in sites where even one block was too much, so the ramps were the better option. If I had to choose one or the other, I’d probably go for the blocks because they can also be used for the stabilizer jacks (what we use them for most often now).
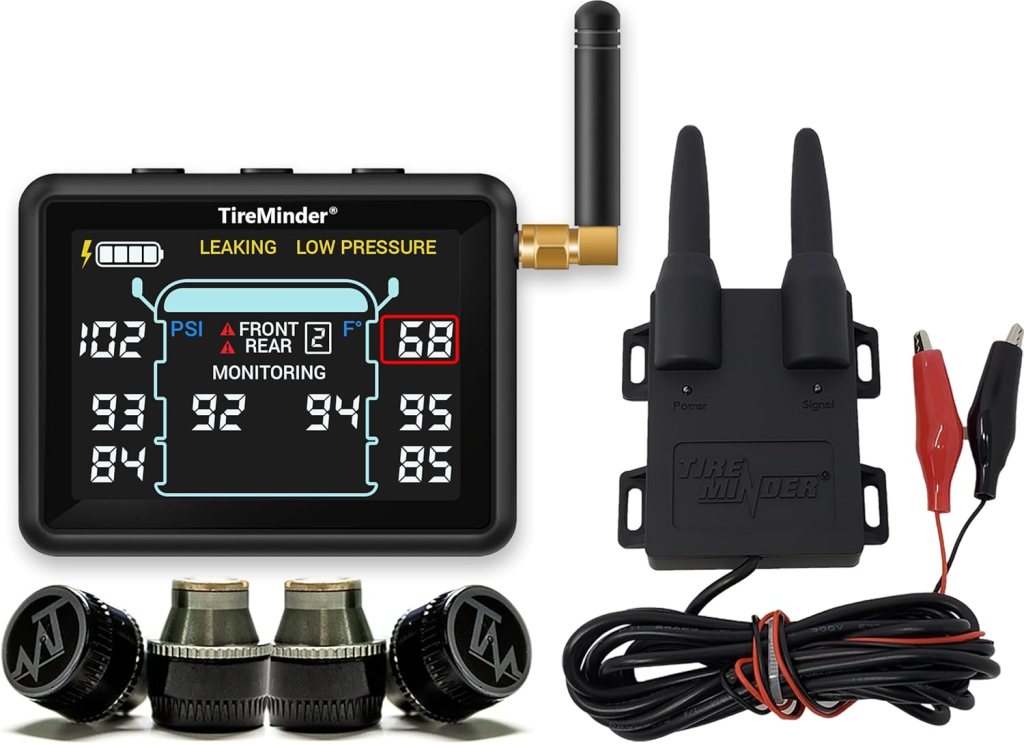
Tire Pressure Monitoring System (TPMS) and Tire Inflator
Tires and tire pressure are things that I obsess over before and on travel days. Check a Youtubers or Instagram RVers page and they have most likely experienced some kind of tire mishap in their travels. Unfortunately, tire mishaps are a common thing and can happen to even the most prepared person, but you can do things to try to prevent them and be aware of a problem before it because unsafe.
Most importantly, don’t over weigh your rig. Each RV has a Gross Vehicle Weight Rating (GVWR). That means what’s already in the rig from the factory and what you put in it, including water, can’t exceed the GVWR.
Second, take care of your tires by making sure they are properly inflated. On the side of every rig are at least two stickers. One of those tells you the GVWR and the other tells you what size tires you have and what their cold PSI should be. Go by this sticker and not the tire itself, (they are usually the same but can be different). Cold psi is the pressure it needs to be at before you start moving. I do mine either first thing in the morning or at night when the temperature won’t drop more than 10 degrees. If I need to add air to them I use this tire inflator. I can set the PSI and walkaway. It’ll stop once it reaches the PSI I set it for. This one won’t inflate a flat tire back to full but if I need to add 5-10 psi, it’ll do the job. An air compressor would be the best option and eventually I’ll upgrade to one or add one to the truck. I’ll keep you posted when I do.
While we’re moving, I use this TPMS to see how the tires are doing. The PSI will increase as you drive and as the tires heat up. That’s a good thing. That’s why you go by the cold PSI when inflating before your trip. The tire is made to endure the higher pressure from a hotter tire. The TPMS will alert you if the PSI jumps too much (usually more than 10- 15psi) or if it drops below. Both scenarios are cause for concern and need to be addressed as soon as it’s safe to do so. The TPMS will also monitor the temperature of the tire. Too hot also signifies a potentially dangerous situation.
Tire blowouts on any vehicle can be extremely dangerous. On a towable, it’s arguably even more dangerous. A blowout can cause the trailer to sway, taking the tow vehicle along for a ride and putting you and those around you in a very dangerous predicament. A TPMS can alert you of a problem before it gets to that. If you’re towing a 5th wheel or travel trailer longer than 25’, having a TPMS with a repeater is the best way to go. This will ensure the monitor in the truck will stay connected to the sensors on the tire. Even if the one you’re buying claims it can reach 100 feet, it’s most likely only when standing still and not actually moving. When your moving on the interstate is when you want it working properly the most. I can’t recommend having a reliable one enough.
Bonus Items

Water Filter- you can use this simple water filter from Camco. Just attach it to the hose and the water going into the rig will be filtered. This does a really good job for the price. You can also buy their bigger three stage filter. It of course comes with a cost, but many Rver’s say there is a big difference. We’ve used the simple one for 2 years (changed every year) and have been happy with it. We do use a Brita pitcher for our drinking water as well mostly just for taste. Filters are a great idea since you don’t know where the RV park or campground water source is, but I don’t list as essential because it can be considered a preference thing. Also, some people just prefer to fill their fresh tank from home rather than using the RV park’s altogether. Remember, water is heavy. Don’t exceed your GVWR and a heavier vehicle means decreased fuel mileage.

X- Chocks (dual axle trailers)- these are not meant to replace the rubber wheel chocks I mentioned earlier. These go between the tires to eliminate the back-and-forth motion of the rig when you’re walking around inside. They do make a significant difference in my opinion but not a must have to enjoy your Rving experience. We use these from BAL for our wide axle or wide stance trailer. If you have regular spacing you can use these instead, also from BAL. My first two years, I used these generic ones, and they worked just as good.
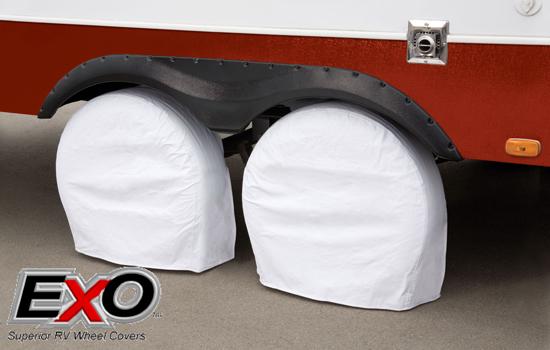
Tire covers- when you’re parking for a long period of time, especially in the sun, you’ll want to cover your tires. The sun can wreak havoc on tires. It can cause them to crack which can eventually lead to a blowout. If we are anywhere for more than few days, we cover our tire. See, I told you I obsess about tires. These should be on my essentials list but if you’re in a completely shaded area, I can see why this wouldn’t be essential.
I hope you all found this information useful. Please feel free to drop a comment below if you liked it or if you think I left something off that you find is essential for your RV travels.
90 Degree elbow for hoses- I use this elbow from Camco. While you don’t NEED this it does help create a better connection. Before using this the hose would leak at the fitting on the RV. Now I have no leaks. I think for the price it’s definitely worth it.
Water Sensors- leaks in an RV can be disastrous. That’s why I suggest using this Govee Water sensors. Place these under your sinks, shower, and or any water connections you can get to. Just a drop of water will set these things off and you’ll have peace of mind knowing that if a leak starts you’ll get to it before it becomes a major problem.
Safe travels and God bless!
***Some links on this website are affiliate links, which means that at no additional cost to you, I may earn a commission if you click through and make a purchase. I only recommend products or services that I believe will be valuable to my readers and align with the content of this website.
Please note that I am not obligated to provide positive reviews or endorsements, and all opinions expressed are my own.
Thank you for supporting this website!***

Leave a comment